
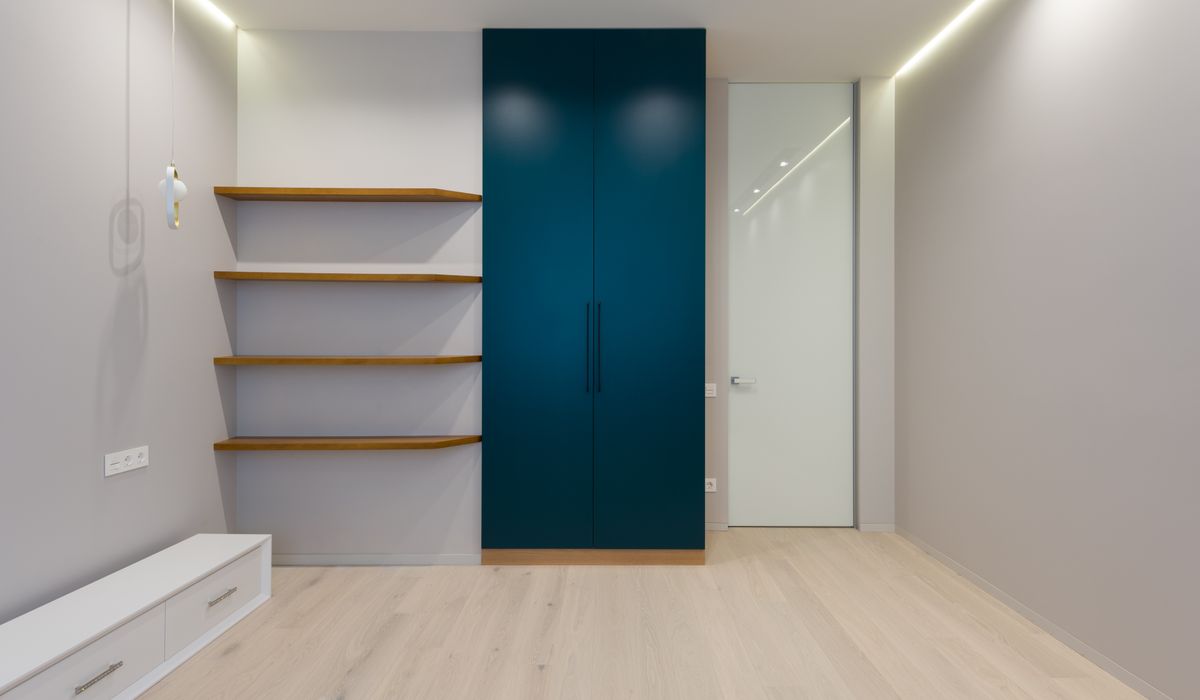
Building Simple Floating Shelves for an Alcove
Start With the Recess, Not the Shelf
Alcoves are the awkward, wonderful gift of older British homes. That recess beside the chimney breast is dead space until you give it a job, and floating shelves are usually the neatest answer. But before you order timber, spend ten minutes measuring properly, because very few alcoves are square.
Take the width at the top, the middle and the bottom of the recess. They will almost certainly differ, sometimes by as much as 15mm in a Victorian terrace where the plaster has been patched over the decades. Work to the narrowest measurement, then subtract 5–8mm so the shelf slides in without gouging the wall. A shelf that rattles about by 3mm is fine; one that needs hammering into place is a ruined afternoon.
Check the depth you actually need. Most alcove shelves sit comfortably at 250–300mm deep — enough for paperbacks, a couple of plants and a small lamp, without jutting so far that you bang your shoulder on them. Also look for obstacles: skirting boards, a picture rail, an old radiator pipe, or a lintel above. Any of these will change where your lowest and highest shelves can sit.
Choosing the Right Timber and Bracket
For painted shelves, 18mm MDF is hard to beat. It is flat, stable and takes paint beautifully. If your shelf spans more than about 900mm, step up to 25mm to stop it bowing in the middle, or keep 18mm and add a third bracket. Pine is a good choice if you want a waxed or limed finish, though you will need to knot and prime it carefully.
For the floating look, a concealed rod-and-plate bracket is the simplest reliable system. A steel plate screws flat to the wall, and two or more steel rods push into holes drilled into the rear edge of the shelf. Nothing shows from below.
Work out how many brackets you need:
- Up to 700mm span: two brackets, set about 100mm in from each end
- 700mm to 1.2m: three brackets, evenly spaced at roughly 400mm centres
- Anything longer or carrying heavy books: four brackets, or a thicker board
Match your drill bit exactly to the rod diameter. If the rods are 10mm, you need a 10mm bit and holes around 100mm deep — measure the rod length first, then mark your bit with masking tape so you do not drill through the face of the shelf.
Setting Out and Fixing the Brackets
Decide your shelf heights before you touch a drill. As a rule, the bottom shelf wants to clear any skirting, and the top shelf should stop 200–300mm below the lintel or ceiling so the alcove does not feel crammed. Mark each height on both side walls and join the marks with a pencil line, checking with a spirit level as you go.
Offer the first plate up to the wall, centred on your line, and mark the screw holes. Aim to catch at least one solid fixing — the brick or block behind the plaster, not just the skim. Drill with a 6mm masonry bit to about 60mm deep, tap in wall plugs, and screw the plate home. If you hit a hollow patch, use a proper cavity fixing rated for the load rather than hoping for the best.
Fit all the plates, then lay a long spirit level across the rods to confirm they line up. A 2mm discrepancy here becomes a visibly wonky shelf, so sort it now rather than later.
Drilling and Sleeving the Shelf
The trickiest part is transferring the rod positions onto the back edge of your board. The reliable method is to make a template: hold a strip of thin ply or stiff card against the fitted plates, press it onto the rods so they leave marks, then use that strip to mark your shelf. Repeat for each shelf, because a few millimetres of drift is normal.
Drill squarely. A drill guide or a pillar drill is ideal, but a steady hand and a check with a try square works. Drill slightly oversize — half a millimetre — so the shelf slides on with firm hand pressure. Never hammer it on; you will split the board or bend a rod.
Do a dry fit before any finishing. All being well, the shelf should push on and sit flush against the wall with a clean shadow line.
Finishing the Edges and the Wall Joint
MDF edges drink paint, so seal them first with a coat of primer or a smear of diluted PVA, then sand at 180 grit, fill any dents, and finish at 240 grit. Iron-on edging tape gives a crisp, factory-looking edge if you would rather not fill and sand.
Paint the shelf and the brackets' visible plates before final fitting. Once everything is in place, run a thin bead of decorator's caulk along the join between shelf and wall and smooth it with a damp finger. This makes the shelf look built in rather than balanced on. If you might want to move the shelves later, skip the caulk on one side so you can still slide them off.
Styling a Small Alcove So It Stays Tidy
Floating shelves look best when they are not full. Leave roughly a third of each shelf empty, and vary the height of what you place there — a stack of books laid flat, a small vase, a framed print leaning back against the wall. Group objects in odd numbers and keep the busiest shelf at eye level.
- Use woven baskets or lidded boxes on the lower shelf to hide clutter
- Keep the top shelf sparse; a single trailing plant or a candle is plenty
- Repeat one material — oak, brass, ceramic — so the display feels deliberate
- Leave the shelf directly under a lamp clear, so the light pools rather than fights
Done well, an alcove of floating shelves reads as part of the architecture: quiet, level and exactly the right size for the space it was made for.
tag: DIY Projects

Sophie Bramley Author
Sand, prime and repaint an old chest, then add new handles and felt liners to give it a fresh life in a bedroom or hallway.
YOU MAY ALSO LIKE
Upcycling a Chest of Drawers for Extra Storage
Jul 25
10A bay window can host a dressing table, a window seat or a small armchair, depending on how much light and privacy you need.
read more
Making the Most of a Bay Window in a Bedroom
Jul 22
10Older bays often suffer from condensation and draughts, so check seals, add secondary glazing and ventilate the room regularly.
read moreAlcove Ideas
-

ERRIC CATONA
A slim console, wall hooks and a mirror can transform a narrow entrance into a practical and welcoming space for coats and keys.
May 19, 2016 at 5.12 pm
Reply
ERRIC CATONA
Open shelving looks tidier when small items are corralled into matching baskets, labelled boxes or lidded containers that suit the room.
May 19, 2016 at 5.12 pm
Reply -
ERRIC CATONA
Linen, jute, rattan and pale timber layers create a relaxed coastal mood without relying on obvious nautical ornaments or themed accessories.
May 19, 2016 at 5.12 pm
Reply
Bay Windows
Your email address will not be published.